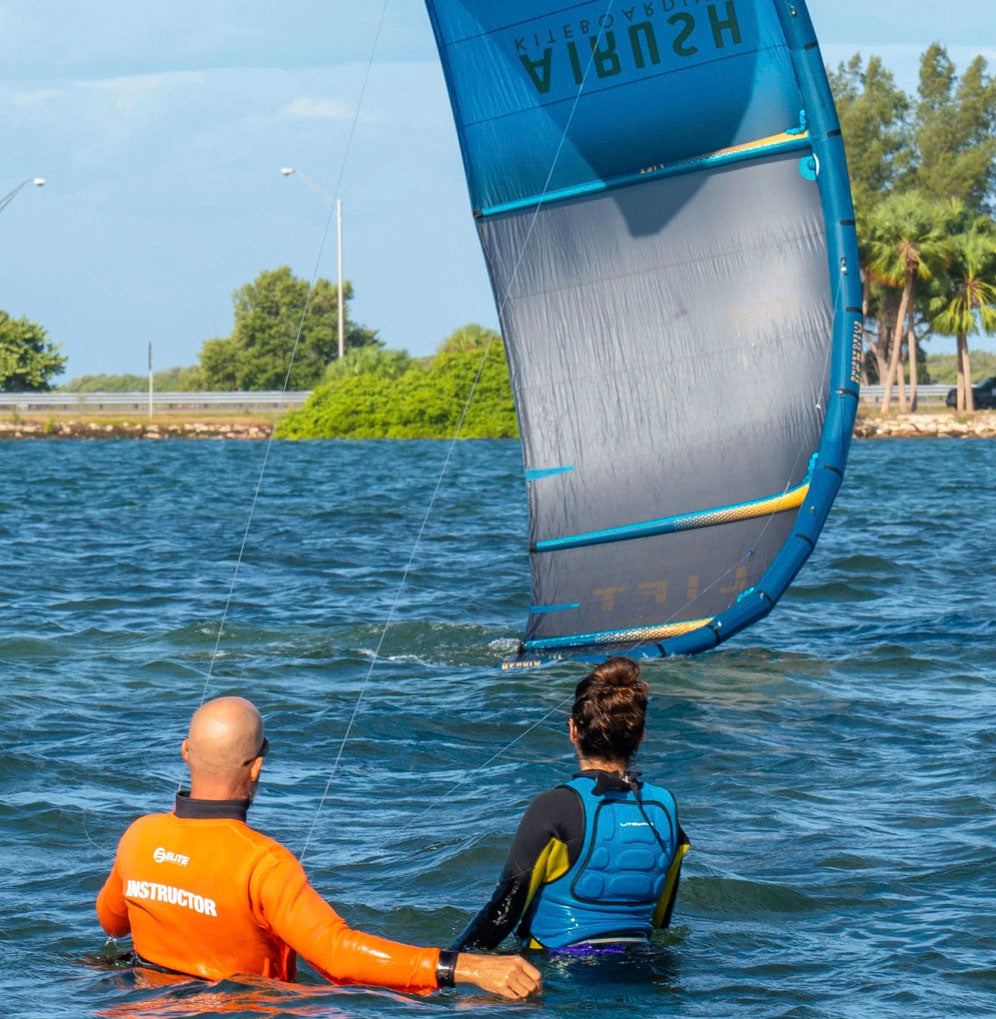
ELITE WATERSPORTS
Last updated 5-19 -2025
Kitefoil Tack vs Jibe: What’s the Difference and Which One to Learn First?
Everything you need to know.

Introduction
If you're just getting into kitefoiling—or trying to clean up your transitions—you’ve probably wondered: What’s the difference between a tack and a jibe? And more importantly, which one should I learn first?
Both are essential skills, but they serve different purposes on the water. A jibe helps you change direction downwind while staying powered. A tack is more technical, requiring you to turn upwind through the wind window. One is smooth and flowy, the other more advanced and precise.
In this guide, we’ll break down the differences between tacks and jibes, explain when to use each, and show you how to practice both with confidence. With expert-backed tips from Elite Watersports, you’ll know exactly where to start—and how to progress faster.
Table Of Contents
- What’s the Difference Between a Tack and a Jibe in Kitefoiling?
- How to Practice Your Foot Switch (Before You Even Turn)
- How to Jibe on a Kitefoil (Step-by-Step)
- Should You Switch Feet Before or After the Jibe?
- Line Tension & Turn Radius: Why They Matter
- Bonus: Straight-Line Foot Switch Drills
- Tack or Jibe—Which Should You Learn First?
What’s the Difference Between a Tack and a Jibe in Kitefoiling?
In kitefoiling, a tack and a jibe both help you change direction—but they’re very different maneuvers. Understanding how they work (and when to use them) is essential for building confidence, conserving power, and expanding your range on the water.
The core difference lies in the direction of the turn relative to the wind:
- A jibe is a downwind turn. You carve through the wind in the same direction it’s blowing. This allows you to stay powered up, keep your kite tensioned, and avoid crossing the wind window.
- A tack is an upwind turn. You pass through the wind to the opposite tack, which means momentarily depowering your kite and requiring much more precision in both board angle and footwork.
Because of this, jibes are smoother and easier for most beginners, while tacks are considered a more advanced technique. Jibing lets you keep your momentum. Tacking forces you to manage lift, timing, and balance mid-transition.
Aaron puts it simply:
“Jibing keeps the kite powered. Tacking takes more control. But once you learn both, you unlock full directional freedom.”
Want to go deeper into each maneuver? Check out our full Trick Tip Blog for tutorials, step-by-step videos, and expert-backed advice.
- Lighter weight, making tricks, rotations, and board-offs easier.
- Increased stiffness, which results in more efficient energy transfer—perfect for boosting higher.
- More reactive and snappy, giving advanced riders better edge control.
- Higher-end performance for aggressive riding styles.
🔹 Best for: Big air riders, foot strap freestylers, and those looking for maximum performance and pop.
Is Jibing Easier Than Tacking on a Foil?
For most riders, yes—jibing is significantly easier to learn than tacking on a kitefoil. It’s usually the first transition foilers master, and for good reason: a jibe keeps your kite powered throughout the turn, so there’s less risk of stalling or losing lift mid-transition.
A tack, on the other hand, requires much more finesse. You’re turning upwind, which momentarily depowers the kite. To stay on foil, you need perfect kite timing, precise foot placement, and strong balance. Even with solid fundamentals, many riders spend weeks—or months—just to land their first clean tack.
In contrast, a jibe flows more naturally. You enter the turn with forward momentum, bring the kite to 12 o’clock, and carve smoothly downwind. As Aaron explains in his jibe tutorial, the kite gives you lift when you need it, making the foot switch easier and more stable.
That’s why jibes are the go-to for beginners, light wind sessions, and anyone still building their confidence.
If you’re just getting into foil transitions and want the fastest path to success, start with the jibe—then progress into the tack once you’re comfortable with board and kite control.
Ready to build that foundation the right way? Book a kitefoil lesson with Elite Watersports and get expert coaching tailored to your current level.

What Gear Makes Kitefoil Jibes Easier?
If you’re struggling to land your jibes consistently, your gear might be part of the problem. Choosing the right setup can make a huge difference—especially in the early stages of foil progression.
Here’s what Aaron recommends for easier jibes:
- Use a larger foil. Bigger front wings create more lift at slower speeds, which means you can stay balanced and on foil longer through the turn. A slower foil gives you more time to complete your carve and foot switch without rushing.
- Ride a larger board. Extra volume and surface area improve stability. When you touch down mid-jibe (which you will), a wider board is more forgiving and easier to recover from.
- Fly a larger kite. More canopy means more lift—exactly what you need when unweighting your feet or switching stance. Aaron suggests sizing your kite based on what twin tip riders are using in the same conditions.
Starting with gear that favors lift, control, and forgiveness gives you a better platform to learn. Once you’ve nailed the fundamentals, you can scale down to faster, more agile equipment.
Looking for gear that helps—not hinders—your transitions? Explore our foil gear collection to find setups tested and recommended by the Elite Watersports team.
How to Practice Your Foot Switch (Before You Even Turn)
Before you attempt to jibe or tack on the water, you need to be confident switching your feet. Footwork errors are the most common cause of failed transitions—and the easiest problem to fix with proper practice.
Both of Aaron’s tutorials emphasize one thing: master your foot switch on land first.
Here’s how to build your footwork from the ground up:
- Start in your normal stance. Let’s say you’re riding left foot forward. Your goal is to bring your back (right) foot forward into the exact spot your front foot was.
- Use the “penguin stance.” This means placing both feet near the front of the board, slightly pointing inward. It gives you a stable, centered platform before completing the switch.
- Practice with your eyes closed. Aaron recommends repeating the drill until your front foot lands in the same spot every time—even without looking.
- Use a visual marker. Draw a line in the sand or use your kite lines to simulate board width and stance.
This kind of dry-land training builds the muscle memory you’ll rely on when you're under pressure mid-transition.
Looking for the perfect conditions to drill without committing to full turns? Browse our light wind gear—ideal for slow-speed control and early-stage progression.
Kite Positioning: The Key to a Smooth Transition
Whether you’re tacking or jibing, your kite’s movement controls the flow—and timing it wrong is one of the easiest ways to blow the transition. Understanding when and how to move your kite is critical for staying on foil, especially in light wind.
For a Jibe:
- Start with the kite at 1:00 or 11:00 depending on your tack.
- As you begin your carve, bring the kite up to 12:00 for lift.
- Once you switch feet, dive the kite to 2:00 or 10:00 to regain power and stabilize in the new direction.
This overhead lift makes it easier to unweight your feet and keep foil engagement. It also prevents the kite from stalling mid-jibe.
For a Tack:
- The kite should also come to 12:00, but the difference is in the hand position. Aaron emphasizes using your back hand only to guide the kite.
- Wait until you feel that moment of lift—then switch feet.
- Once stable, redirect the kite in the new direction to power out.
Pro tip: Your kite’s lift should initiate your foot switch, not follow it. Let the kite guide your timing—not the other way around.
How to Jibe on a Kitefoil (Step-by-Step)
Jibing on a kitefoil is one of the smoothest ways to change direction—if you break it down correctly. Here’s a proven step-by-step process, based on Aaron’s real-world coaching at Elite Watersports:
1. Start With a Slightly Upwind Line
Begin on a steady, slightly upwind course—not overpowered or drifting. Keep the ride line consistent to set up a smooth carve.
2. Fly the Kite to 12:00
As you prepare to initiate the turn, bring the kite overhead. This creates lift and makes the stance switch easier.
3. Initiate a Gentle J-Hook Carve
Carve into the breeze in a soft arc. “You want to angle into the breeze like a little J-hook—just like a carving load and pop on a twin tip,” Aaron explains.
4. Switch Feet Mid-Turn
Depending on wind strength, switch your feet during or just before the carve. Focus on landing them precisely and staying centered.
5. Dive the Kite for Power
Send the kite down to 2:00 (or 10:00) to power out of the turn and maintain forward momentum.
6. Stabilize and Ride Out
Hold your new stance briefly to regain control and tension before trimming or looping.

Should You Switch Feet Before or After the Jibe?
This is one of the most common questions riders ask: Should I switch my feet before I turn, or after I complete the jibe? The answer depends on the wind strength—and your comfort level.
In Light Wind Conditions:
Aaron’s clear advice is to switch your feet before the jibe. This keeps you better powered throughout the turn. When you switch early, you avoid having to change your stance when you're already underpowered in the middle of a toeside carve.
“If I do the transition to toeside and then switch my feet, I’m going to be super underpowered,” Aaron explains. “If you can learn the footwork before your jibe, you’re going to come out of that turn with a lot more power.”
In Stronger Wind:
You can get away with switching feet after the carve. There’s enough power in the kite to keep you moving—even if your footwork is a beat late.
Ultimately, both methods are worth learning. But starting with a pre-jibe foot switch builds better consistency and control in marginal conditions.
Want to master both styles and know which one to use when it counts? Book a lesson with Elite Watersports for hands-on coaching that adapts to your gear, skill, and wind conditions.


Line Tension & Turn Radius: Why They Matter
Even if your footwork and kite control are dialed, a jibe or tack can still fail if you lose line tension during the turn. Without tension in the lines, the kite won’t respond—and that’s when stalls, crashes, or failed transitions happen.
Aaron breaks it down clearly in his jibe tutorial:
“It’s all about line tension right after you do the foot switch. If your lines go slack, the kite won’t pull—and you’ll lose drive.”
Why It Happens:
- Carving too tightly causes the kite to overfly and slacken the lines.
- Going too slowly through the transition can also kill tension.
- A poorly timed kite dive or foot switch compounds the issue.
How to Fix It:
- Keep the kite engaged during the carve—don’t let it drift too far overhead.
- If needed, edge away from the kite slightly or initiate a light downloop to restore tension.
- Practice holding a toeside edge for a few seconds post-jibe to stabilize line feel before redirecting.
And remember: this isn’t just a jibe issue. Tacks can also suffer if you rush the footwork or underpower the kite. Proper tension keeps everything flowing.
Bonus: Straight-Line Foot Switch Drills
One of the fastest ways to improve your tacks, jibes, and transitions—without crashing or losing power—is to isolate your foot switch on a straight line. No turns, no carving. Just repetition.
Aaron calls this “dancing on your dance floor”—and it’s how top riders build precision and confidence before they ever attempt a full maneuver.
Here’s how to practice:
- Ride a steady, slightly upwind line with moderate power.
- Bring your kite up to 12 o’clock to create lift.
- Step through your foot switch, moving your back foot forward and shifting into your new stance.
- Hold the position, ride straight, and repeat—switching back and forth between regular and switch stance.

You’re not trying to complete a turn here. You’re drilling the core skill that supports every tack and jibe.
This type of controlled repetition helps you:
- Improve balance and stance consistency
- Build muscle memory for foot placement
- Time your kite lift more effectively
It’s also a low-risk way to practice during light wind sessions or between rides when you’re not ready to commit to full transitions.

Tack or Jibe—Which Should You Learn First?
So which transition should you focus on first—tacking or jibing?
For most riders, the answer is clear: start with the jibe. It’s the smoother, more forgiving transition that keeps you powered up and on foil through the turn. Jibes are easier to learn, and they help build the foundation for more technical maneuvers later on.
Tacks, while more difficult, offer a different kind of freedom. Turning upwind through the wind opens up new angles, lets you ride switch confidently, and helps you navigate tighter setups or waves. Once you’ve built up balance, kite control, and board awareness, tacking becomes the next milestone in your foiling progression.
As Aaron puts it:
“Most people learn to jibe first, and that’s smart. But once you’ve got the flow down, tacking is what gives you full control on the foil.”
Need Help Learning to Jibe or Tack?
Video tutorials are great—but nothing beats live coaching. If you're serious about progressing, one-on-one instruction can shortcut months of trial and error. Elite Watersports offers hands-on guidance, real-time feedback, and personalized gear recommendations to match your goals.
Call or stop by Elite Watersports to book a lesson—we’ll get you riding with confidence in no time.
Where to take kiteboarding lessons in Florida.
 Reserve A Lesson
The nearest kiteboarding shop and kite school that services Dunedin and Clearwater is Elite Watersports located in St Petersburg. Give us a call and we can get you up and riding in no time. We teach kitesurfing lessons at Skyway beach a short drive south of Dunedin. Our condions are also beginner friendly and perfect for learning.
Call us for more info on kiteboarding in Florida.
Elite Watersports has served the Tampa and St Petersburg area for years. They offer kiteboarding and wingsurfing lessons. They also have a retail shop equpit with all of the latest kitesurfing gear.
If you need help give us a call. .
(727)-800-2202

Author

Ryan "Rygo" Goloversic
Rygo is a globally recognized kiteboarder, Airush team rider and an advocate for wakestyle kiteboarding. When he's not writing articles or producing kite videos you can catch him competing on the KPLxGKA world tour or grinding it out in the gym
Tags
Kiteboarding self Rescue

Want To learn more about kiteboarding?
Follow us to receive the latest update on our journey experience